Spring Boot with Thymeleaf tutorial, part 1

In this tutorial I am going to show you how to set up your first project using Spring Boot. I will use Maven and Thymeleaf as a template engine.
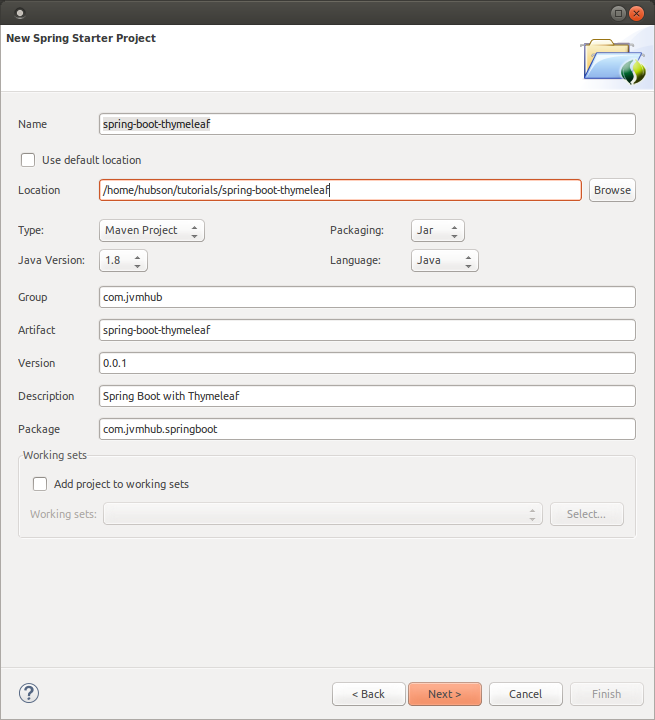
1. Create new project using Spring Tool Suite. Click File – New – Spring Starter Project. Fill inputs as in the picture below. Click Next button. If you do not use Spring Tool Suit you can use web version of this generator on http://start.spring.io.
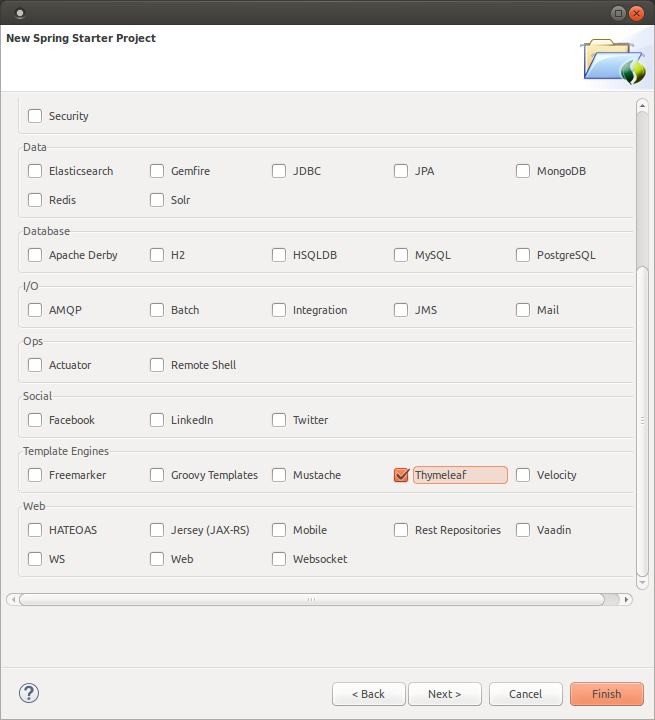
2. On the next check Thymeleaf as a template engine. Click Finish.
3. Spring Starter Project generated new Maven project with pom.xml where are added all needed dependencies, especially spring-boot-starter-thymeleaf.
<?xml version="1.0" encoding="UTF-8"?>
<project xmlns="http://maven.apache.org/POM/4.0.0" xmlns:xsi="http://www.w3.org/2001/XMLSchema-instance"
	xsi:schemaLocation="http://maven.apache.org/POM/4.0.0 http://maven.apache.org/xsd/maven-4.0.0.xsd">
	<modelVersion>4.0.0</modelVersion>

	<groupId>com.jvmhub</groupId>
	<artifactId>spring-boot-thymeleaf</artifactId>
	<version>0.0.1</version>
	<packaging>jar</packaging>

	<name>spring-boot-thymeleaf</name>
	<description>Spring Boot with Thymeleaf</description>

	<parent>
		<groupId>org.springframework.boot</groupId>
		<artifactId>spring-boot-starter-parent</artifactId>
		<version>1.2.5.RELEASE</version>
		<relativePath/> <!-- lookup parent from repository -->
	</parent>

	<properties>
		<project.build.sourceEncoding>UTF-8</project.build.sourceEncoding>
		<java.version>1.8</java.version>
	</properties>

	<dependencies>
		<dependency>
			<groupId>org.springframework.boot</groupId>
			<artifactId>spring-boot-starter-thymeleaf</artifactId>
		</dependency>

		<dependency>
			<groupId>org.springframework.boot</groupId>
			<artifactId>spring-boot-starter-test</artifactId>
			<scope>test</scope>
		</dependency>
	</dependencies>

	<build>
		<plugins>
			<plugin>
				<groupId>org.springframework.boot</groupId>
				<artifactId>spring-boot-maven-plugin</artifactId>
			</plugin>
		</plugins>
	</build>


</project>
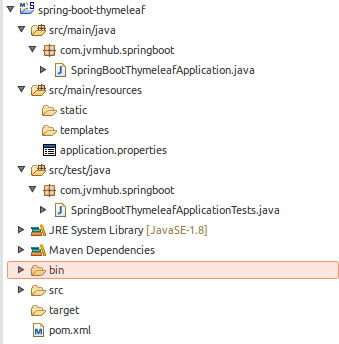
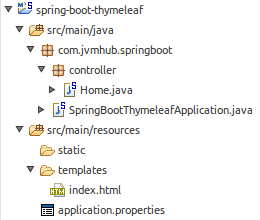
We have got now project with very simple structure as below:
Class SpringBootThymeleafApplication is responsible for running the project and it looks like below:
package com.jvmhub.springboot;

import org.springframework.boot.SpringApplication;
import org.springframework.boot.autoconfigure.SpringBootApplication;

@SpringBootApplication
public class SpringBootThymeleafApplication {

    public static void main(String[] args) {
        SpringApplication.run(SpringBootThymeleafApplication.class, args);
    }
}
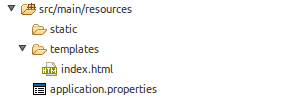
4. Usually Spring Boot application created in this way is ready to run, but using a Thymeleaf needs a little bit more effort. We have to create a new template file in templates directory. Create index.html file.
<!DOCTYPE html>
<html xmlns:th="http://www.thymeleaf.org">
<head>
	<title>Spring Boot and Thymeleaf example</title>
    <meta http-equiv="Content-Type" content="text/html; charset=UTF-8"/>
</head>
<body>
<h3>Spring Boot and Thymeleaf</h3>
<p>Hello World!</p>
</body>
</html>
5. The last step is creating a controller which is able to show us the index.html page. Create new package “controller” and then new Home class in this package.
Add @Controller stereotype to the class and @RequestMapping(“/”) to intex() method whick return the name of template.
package com.jvmhub.springboot.controller;

import org.springframework.stereotype.Controller;
import org.springframework.web.bind.annotation.RequestMapping;

@Controller
public class Home {

	@RequestMapping("/")
	public String index() {
		return "index";
	}
}
6. No you can run SpringBootThymeleafApplication class as a Java Application in STS IDE or execute
mvn package
and then
java -jar target/spring-boot-thymeleaf-0.0.1.jar
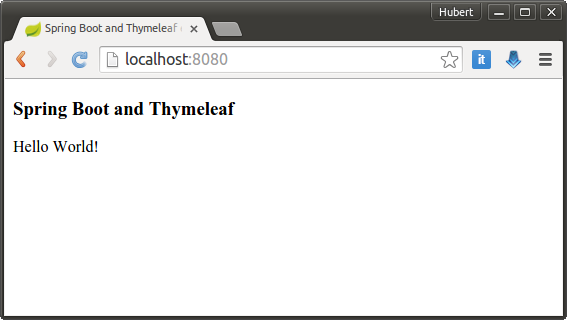
7. Your application is available on http://localhost:8080
Complete source code: https://github.com/jvmhub/Spring-Boot-with-Thymeleaf-tutorial
Pingback: Spring Boot with Thymeleaf tutorial, part 2 – Forms with validation | Java Web Development Blog